Ironside Tech Tip: Connect to Different Data Sources by User or Group Association
Metadata packages usually connect or point to particular data sources, but what if for testing, business, or application reasons you need a package to dynamically reference a different data source based on the executing user, user job function, or user location?
For example, we had a client that supported four separate hospitals using an IBM Cognos BI platform. All of the hospitals used identical reports and package designs; however the data was unique for each location and was physically stored in different locations. The metadata modeler needed an easy way to automatically point to each of the different data sources for users in each location without creating (and maintaining) four separate packages that only differed in their data source connections. Ironside was able to show them how to accomplish this in four steps.
Changing Data Sources Overview
- Create the data source in Cognos Administration for each of the user locations (e.g Hospital_1, Hospital_2, etc.).
- Add a user group in LDAP that associates Cognos users with a particular data source.
- Create a parameter map to associate the user with their appropriate data source and point to it.
- Use a macro in each of the data sources’ definitions to use the elements created in steps 1 and 2 to substitute in the data source that meets each user’s criteria.
Detailed Procedure
The four steps above are the goals behind each of the more in-depth tasks shown below. I’ve broken up the workflows based on which of the overview steps they correspond to.
Step 1: Check Data Source Availability
The different data sources you plan to use must be available in Cognos Connection.
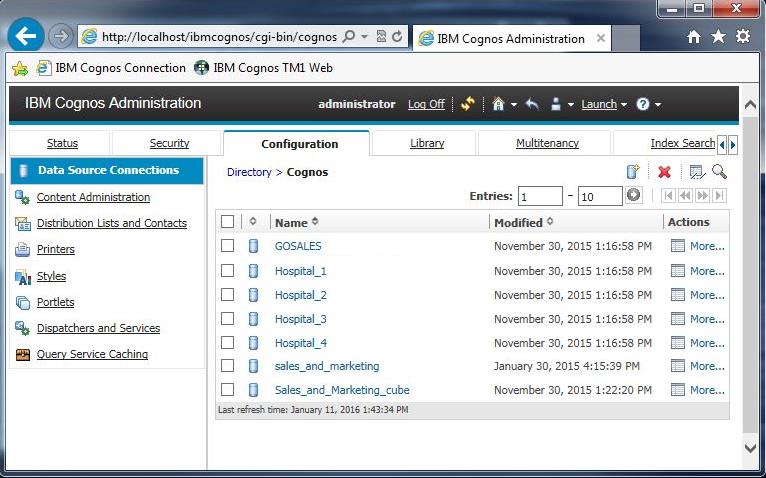
If one of the data sources you need isn’t available, you will need to add it by setting up a connection to it in Cognos Administration.
Step 2: Add Location Information to LDAP
Your environment’s LDAP administrator needs to add a field into each user or group’s security profile that assigns a location to those users and groups that corresponds with the syntax used for your data sources.
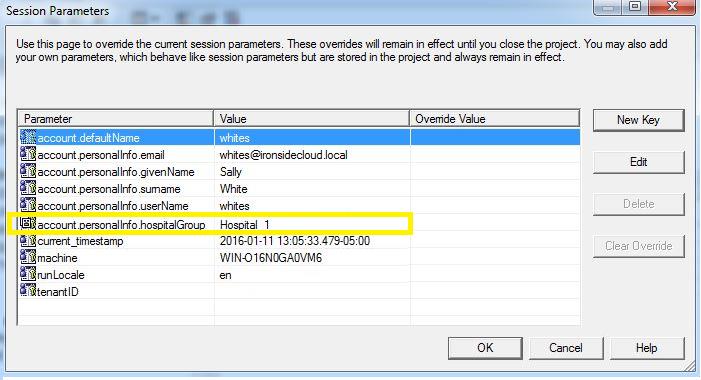
Identifying the locations this way in the security profiles ensures that the user’s information will match the data source they need to access.
Step 3: Build the Parameter Map
To build a parameter map in Framework Manager, you first click Parameter Maps > Create > Parameter Map to bring up the parameter map wizard window and name your parameter map.
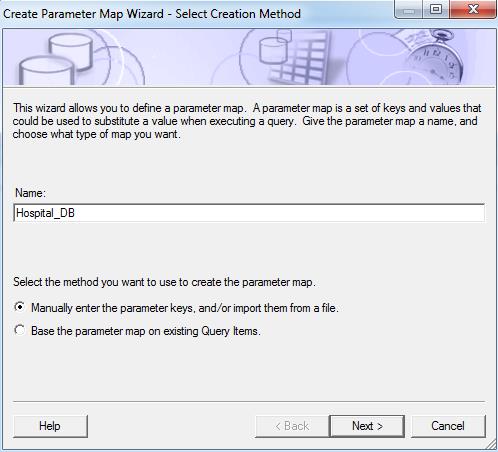
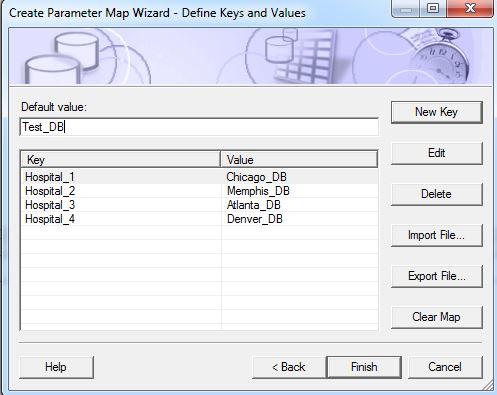
You then define the keys and values in your parameter map so that they correlate with what you entered in LDAP for your users and groups. When all definitions are in place, click Finish to generate the parameter map.
Step 4: Build Macros into Your Data Sources
You edit the definitions of your data sources from a Framework Manager project by expanding the Content Manager Data Source field in the project’s Properties pane.
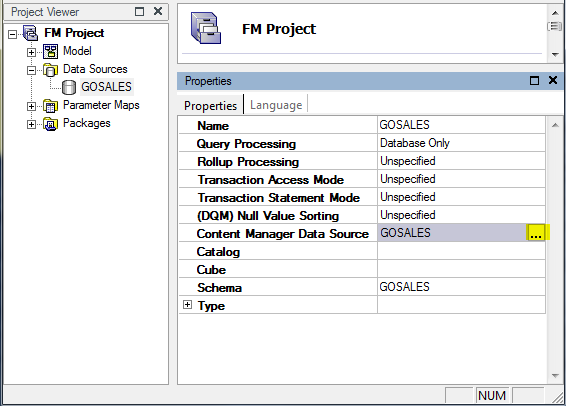
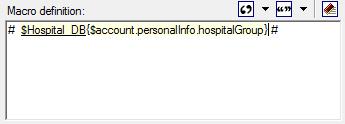
To make it so this property looks to your parameter map to get its data source definition, delete any current information in the window, click the Insert Macro button, and add a macro definition like the one below that contains the names of the parameter map and session parameters you want to use.
The Result: Automatically Interchangeable Data Sources
When users from the different locations you defined log on, they will trigger the macro you created, which will reference the parameter map to point each user at the data source that matches their credentials.
Security and configuration topics are key components of all Ironside’s instructor-led classes. To learn more about how we can help you become a BI expert and apply these and other innovative techniques, please see our upcoming class schedule.
Additional Note: This technique will also work for individual users as well. To set it up this way, create a parameter map listing the user logon names correlating to each data source, then inside the macro (see Step #4) use the session parameter $account.personalInfo.userName
