Ironside Tech Tip: Unlocking the Secret to Concise List Reports
This is the first in a series of articles for the Ironside Cognos Report Studio Cookbook. These are tips and tricks used by our professional report developers to meet the unique needs and requirements of our clients. While some of these techniques may be touched upon in a typical Report Studio training class, we will take a deep dive into these concepts to uncover how our professionals actually use them in the field every day. This month’s article will focus on how to make concise list reports by unlocking the report format.
Difficulty: Easy
Required Ingredients: List Object
Scenario
Your manager comes to your desk holding an 11×17 sheet of paper printed in landscape orientation. She looks at you and says, “Can you somehow fit everything in this report onto a standard 8.5×11 sheet? I need everything on here, but it’s simply too wide.”
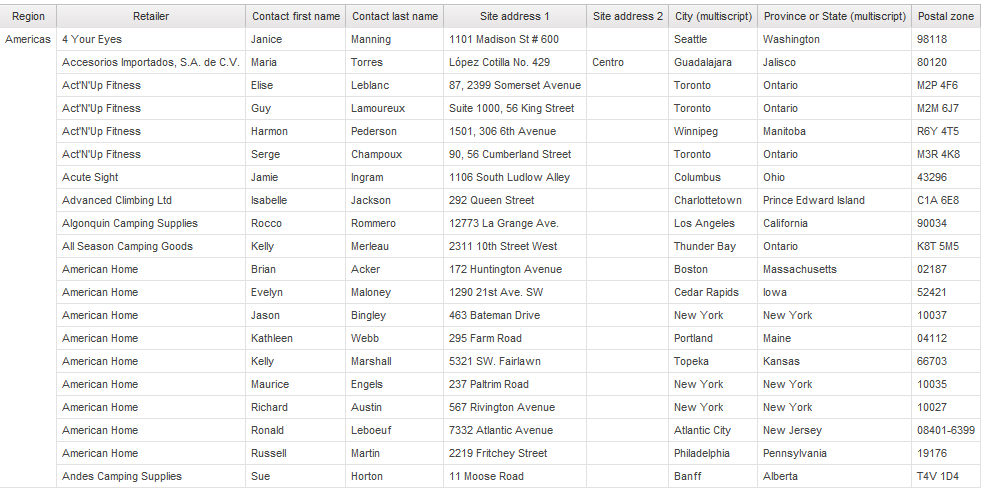
A typical list report will display one element per report column (as shown below).
In some cases this may be adequate, but often it takes up too much horizontal space. You can concatenate fields, but consumers are looking for a format even more intuitive and easier to read. Unlocking the report format allows you to report more than one element per column, which is important in highly formatted but concise list reports. In this example, we will add multiple elements to the address field.
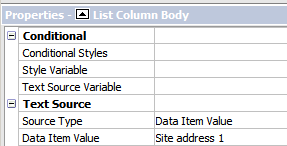
Step 1: Begin with a locked list report (the default setting for Report Studio). Notice that when you click on a column item, the Properties menu shows that you are clicking on a List Column Body.

Now unlock the report format using the Unlock icon. ![]()
By clicking directly on a cell in the list object, you reach a level below the List Column Body, which is a Text Item. The text item is a child object of the list column body. Notice the difference in the highlighting in the report column.
Unlocked
Locked
Pro tip
Only unlock the report format while you need to. Once you are done manipulating the layout, toggle the lock option back to the locked position. The typical layout tasks you need to perform (e.g. adding new columns to the list) are much easier with the format locked.
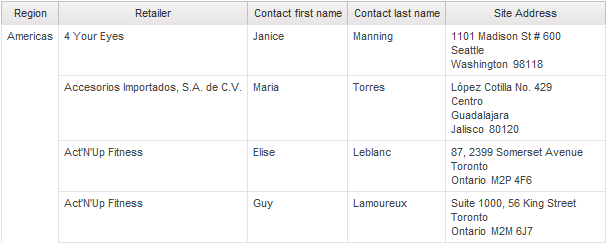
Step 2: Drag other related items from the report into one column. Since you already had all of these items (e.g. City, Postal Code etc.) on the report, they are already in the existing query. You can simply add them from the existing query and drop them into the same column. Deleting the existing columns for the items you’ve moved into the State address 1 column, we get the following result, which is closer to your requirement of having more concise list reports.
Step 3: Arrange the items in the column more appropriately by adding blocks to the column and placing the address items inside the blocks.
Step 4: Add some padding space to the elements in the column if there is more than 1 element within a block, such as the State and Postal Code.
Step 5: Modify the column header to better reflect the column contents.
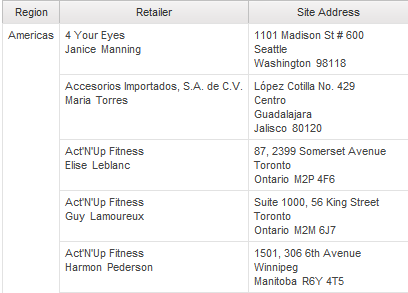
Step 6: Repeat this consolidation process for other columns within your list.
Other Applications
This same technique for building concise list reports can also be used in other types and areas of reports. For example, you can add information to the column headers. It’s also a great way to add multiple layers of information to crosstab reports. As the information becomes denser, you may wish to add text item labels to clearly identify the report elements. All of this is done in exactly the same manner.


