TM1 and Report Studio – The Mystery of the Missing Levels
As many of you know, TM1 has become a major component of the IBM Cognos BI application offerings. As a corporate OLAP solution, there are a number of advantages to utilizing TM1 versus PowerPlay; from faster response times in larger cubes to the capability to handle vast volumes of data. The expectation of course is that the application will work within the IBM Cognos BI infrastructure, specifically within the user facing studios that make Cognos a best of breed solution. While this is true in most aspects, there are a couple of “work arounds” that must be implemented in order to optimize the user experience with TM1 as an MDX based data source.
The intention of this article is to provide developers with the steps necessary to create “named levels” within TM1. While this is not the only step that needs to be completed to implement seamless integration of TM1 with the IBM Cognos Studios it can often be the most over looked and obscure modification. “Named Levels” are critical to ensure that all common OLAP functions, which are based off of MDX hierarchy design, are available in Report Studio for cube based report development.
In order to create the “Named Levels” in TM1, it is necessary to modify one of the control cubes, in this case the }HierachyProperties control cube, that are automatically generated with each TM1 server instance. By default the control cubes are not displayed in Architect. To view the cubes, select the View -> Display Control Objects menu item.
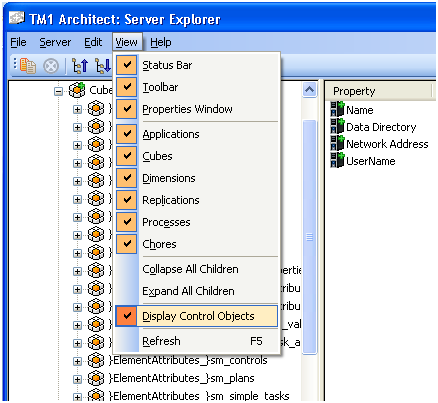
Once the control cubes are displayed in the left hand pane, all control cubes are distinguishable by the right curly bracket “}“, locate the }HierarchyProperties control cube under the Cubes section. Right click on the cube and select Browse. The Cube Viewer will open.
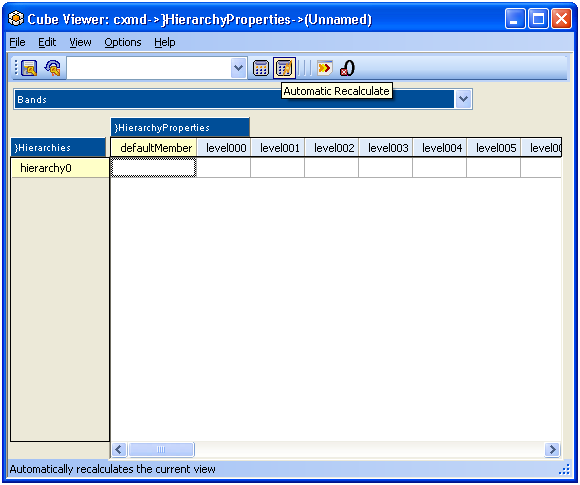
Click on the Automatic Recalculate to show all the intersections for the current selection. Notice that there are 20 available levels that can be defined for each unique dimension. Of course not all of your dimensions contain 20 levels and the developer should only fill in the levels that are required for the particular dimension being addressed. The order of the levels is defined as level000 being the top level in the hierarchy, level001, being the second level and so on. In addition, notice that a defaultMember, which can be referenced by several of the common functions in Report Studio,
can be set for the particular dimension.
By selecting the drop down list at the top of the browser, you will see all the other dimensions that are defined within this TM1 server instance. Those dimensions that start with a “}” can be ignored as these are control dimensions used internally by TM1.
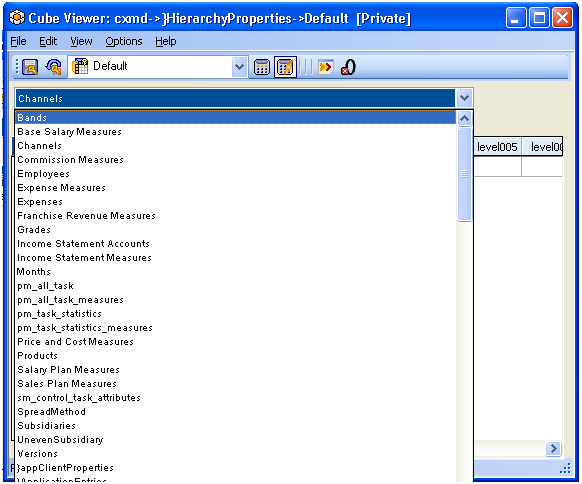
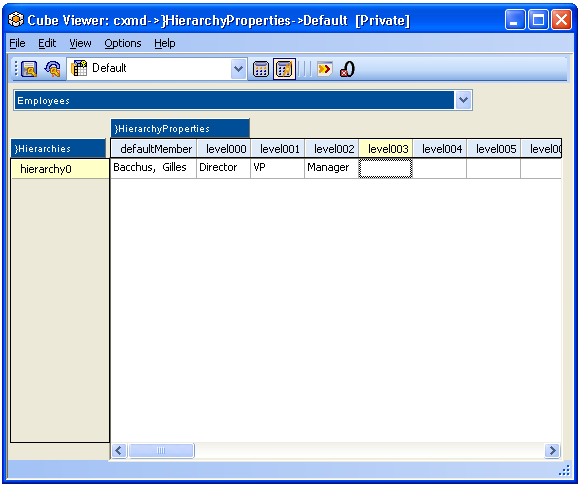
To add levels to a dimension, simply select the dimension from the drop down list and enter the names for each level. Names can be input by clicking on the cell related to the level and entering the appropriate text. In the below example, “Gilles Bacchus” is the default member with the top level being “Director” followed by “VP” and then “Manager”.
Once you have set all the values, it is necessary to save this data to the control cube. This is completed by clicking on the “Save Private View” icon in the top left corner. A dialog box will appear asking you to save the view, click on the “Default” check box to activate it.
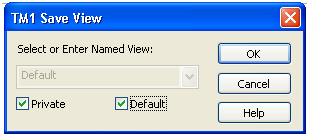
Click “OK” to save the default view and close the Cube Viewer.
The levels will now be available with Report Studio to be consumed by any of the common MDX functions.


