Ironside Tech Tip: Writing a Printable Report
Difficulty: Easy
Required Ingredients: Report Studio, List Object, PDF Viewer
Scenario:
A report that you expected to be viewed exclusively in HTML will need to be printed. In order to do this, you switch the output to PDF to create a printable report and find that the columns span across multiple pages, making the report more difficult to understand.
You’ll need to make some minor modifications in order for the printable report to remain effective.
In the steps below, we begin by defining the PDF page orientation and size to resolve this problem and then take additional measures to further optimize the output.
Step 1: Launch Report Studio, select the GO Sales (query) package with a list report template when prompted. Then drag in the data items shown in the screenshots. Running the report in PDF should look similar to the screenshots above.
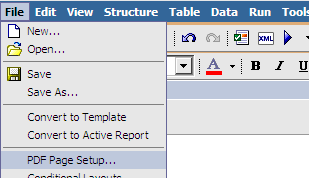
Step 2: Close the viewer and click the File dropdown, then click PDF Page Setup.
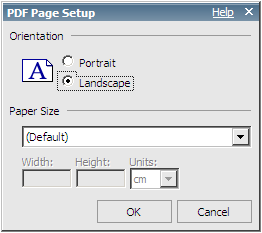
Step 3: Switch the Orientation from Portrait to Landscape and click OK.
The PDF output will now look similar to what is shown below. Although the landscape view can hold more columns, the columns in this particular report still spill over to the next page.
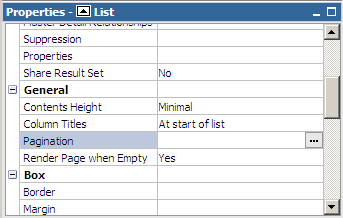
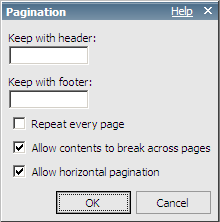
Step 4: In order to resolve this, select the (entire) list, then scroll down to the General section in the Properties pane and double-click Pagination. Then deselect Allow horizontal pagination and click OK.
Step 5: Run the printable report in PDF. Notice how all the columns remain perfectly readable.
Note: The Paper Size setting in the PDF Page Setup is often used to eliminate orphan columns by selecting a larger than standard size and then making use of the Fit to Page feature most printer clients offer. Although this works, it has a tendency to shrink content to a much greater degree.
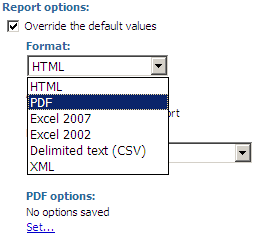
Step 7 (optional): If the primary delivery method for the report will be in print, consider changing the default run option from HTML to PDF through Cognos Connection.
Click the Set properties icon next to the report in question, then switch to the Report tab at the top of this new page.
Once on the Report tab, enable the Override the default values option and then change the format to PDF.
Note: If the orientation was not changed in Report Studio, it can also be changed through the PDF options link above.
Click OK to return to the report folder. Notice how the icon has changed to reflect the new run behavior.


